Signing in with Microsoft account to a Windows laptop has many benefits. It allows automatic sync of our files across different devices, making work with multiple devices seamless, assuming one actually wants all of his/her machines have the same settings and files. However, it also brings one annoying issue: the name of user folder.
When we set up a new Windows laptop with Windows 11, it will ask user to login with Microsoft account. Strangely, it will create user folder using the first 5 character of the user’s first name. In my case, it created a user folder in my laptop with folder name “rober”. Since this user folder is linked to many Windows features, renaming this folder using incorrect method will cause a number of unexpected issues with Windows 11.
Many websites will offer you some guides of playing around with Windows registries or some other hack. I tried some of them, only to waste hours of my time trying to reinstall my broken Windows afterwards. After several failed attempts, I remembered that I had experienced this back in 2021 with Windows 10. The trigger of this 5 characters folder creation is when I choose to login to my laptop using Microsoft account. If I choose to login using local account, it will create “Robert” as my user folder. I tested if my solution from Windows 10 still work with Windows 11 and happily confirm that it does seem to work. After starting with local account, we can always connect that account to a Microsoft account and getting benefits from all the cloud services.
What if you already set up user account with Microsoft account? Follow the following steps to have a user folder with desired name:
- Create a backup of your files and setting in an external drive.
- Some apps might need deactivation to be reactivated in new Windows account, take care of these depending on which apps you have in your computer.
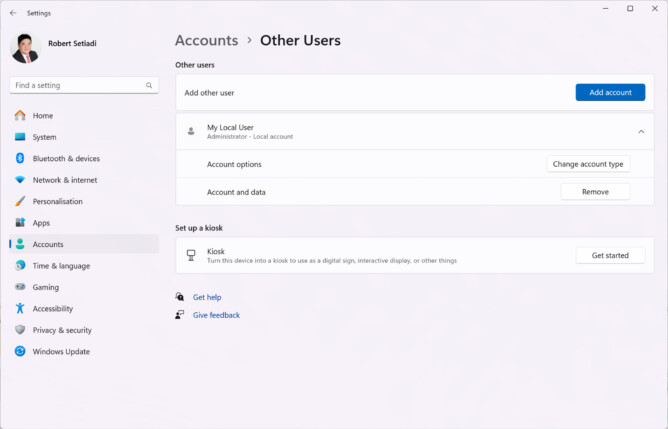
- Go to Settings app and choose the Accounts tab on the left. Go to Other Users and create a new local user with Administrator right.
- Microsoft will ask for a Microsoft login, choose “I don’t have this person’s sign-in information”. Microsoft will insist to create a new account, we can still choose to “add a user without a Microsoft account”.
- Next step will allow you to enter the username. This will be your new account so fill in the information carefully. The account name you put here will be your user folder name.
- Change the account type to Administrator.
- Login with your new account.
- Verify that folder name is correct as you expected.
- Copy your files to the new account. Make sure you have set up everything just like your previous account.
- Once you verify everything works as expected, delete your old account.
That’s it, nice and easy. No Regedit or some risky step involved. Note that Microsoft could remove this option to create local account in the future. This guide works at the time of writing. Hopefully the steps above would be useful.
Leave A Comment