Just got my Raspberry Pi today. In case you don’t know about it, Raspberry Pi is a credit-card sized computer, capable of running a desktop (Linux) operating system, and priced below $50. The physical look is just a board with few basic connectors. To use it, we plug it into a TV or monitor using HDMI (or RCA video). It has 2 USB ports that we can use to attach keyboard and mouse. It has network connection using RJ45 socket or optionally we can purchase additional USB WiFi module. All the files and operating system is stored inside an SD card. Some people use this as multimedia player, some others use it as file server. There are many possible use of this excellent tiny device. I plan to use it as Transmission-daemon.

To start using Raspberry Pi, we need:
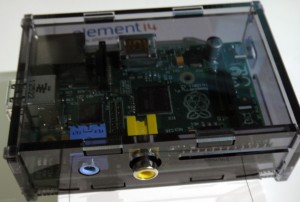
- Obviously, the Raspberry Pi itself
- Optional case
- Power source. Raspberry Pi model B (512MB) is rated to work in 5V 700-1200mA without accessories attached in USB ports. I personally use a USB charger with 2000mA and a micro-usb cable.
- SD card, minimum size is 4GB. I use 16GB. Minimum speed is category 4. I would recommend category 10 or ultra speed.
- Optional monitor or TV with HDMI or RCA video input.
- Optional USB keyboard and mouse
- Optional WiFi USB dongle
- Optional cat 5 network cable
 There are two models of Raspberry Pi. Model B is the standard model with 2 USB ports and 512MB RAM (model B rev 2.0). Model A is the cheaper model with only 1 USB port. There are two types of board: made in China and made in UK. While some users desperately tries to get UK board, many people said that both are actually works fine. I am lucky to get a unit with UK board.
To prepare the SD card, first download from http://www.raspberrypi.org/downloads
There are options of OS you can use there, I will use Raspbian wheezy for this post.
In case you’re interested, here’s a list of OS capable to run in Raspberry Pi: http://en.wikipedia.org/wiki/Raspberry_pi#Operating_systems
After the Raspberry image file is downloaded as a zip file, putting it into the SD card is NOT as simple as copying the file. There are some useful guides just by a quick Googling, here is the one I ended up using : http://elinux.org/RPi_Easy_SD_Card_Setup
As I use Mac OS X 10.8.3 to prepare my SD card, first I downloaded PiWriter. Somehow this tool doesn’t work in my computer. Then I downloaded PiFiller, a different tool made by a different person, and this one worked. Took me less than one hour to prepare my SD card. After the tool has done its job, all we need to do is putting it inside the SD card slot in Raspberry Pi.
Some Mac users reported that they were having problem with SD card prepared in Mac. If problem happens, simply put the SD card into a Windows machine, set Windows Explorer to show hidden files, then delete all the dot files created by Mac. The SD card should work now.
For first run, we will see some setup options. Mouse doesn’t work here, you will need to attach a USB keyboard to do the setup. Make sure to choose expand_rootfs option. This is to resize your SD card partition back to its actual capacity (since Raspbian OS disk image is only 2GB, our card will appear as 2GB SD card, no matter what the actual size is). Optionally you can also choose change_timezone to set your time zone. Then boot_behaviour option will take us directly to the GUI for the next boot. If you somehow need to return to this setup options, you can type sudo raspi-config in terminal.
Restart the Raspberry Pi, and the new computer is ready to use.
One thing to mention about Raspberry Pi power source. Model B is rated 700 mA – 1,200 mA. I started using a USB charger of 700 mA with keyboard and WiFi dongle attached. Things are running smoothly. But when I plugged in USB mouse, my Raspberry Pi suddenly restarted. I turned it off, then turned it on again, infinite reboot. My guess was right, it’s insufficient power issue. I ended up using a 2000 mA USB charger, and things were smooth after that.
Few minutes playing around, Raspberry Pi is reasonably fast, pretty impressive considering the modest hardware spec. There is no problem doing simple browsing with the built-in browser. I’m quite impressed to see this tiny device with desktop capability. Expect more posts from me in the next few days as I play around with this new toy.
Also read: my other posts about Raspberry Pi
Super article, still relevant today.